


Blog - Inspiration

10 Must-Dos Before Buying New Home Appliances
There are many reasons you may be looking to buy new kitchen appliances or laundry machines. Here are top 10 must-dos before you buy a new major home appliance.- Jacob Vanmunster
- Tags: appliances kitchen renovation

The Top 10 Must-Dos Before Buying a Refrigerator
Here are the top 10 must-dos before buying a refrigerator and tips to figure out what refrigerator to buy for your family.- Jacob Vanmunster
- Tags: appliances featured kitchen
How to afford furniture when you’re on a budget
You don't need to empty your piggy bank to get great furniture for your home. Check out our tips for buying furniture when you're on a budget.- Jacob Vanmunster
- Tags: featured furniture living room sofas thrifty

How to Make an Interior Design Mood Board in Four Easy Steps | Comment créer un tableau d’ambiance de décor intérieur en quatre étapes faciles?
Redecorating a room in your home or ready to totally overhaul your space? A great starting point can be using an interior design mood board to set the tone of your brand-new space and creating one will help curate and narrow down what you want it to look like. Think of it as a place to brainstorm your vision before bringing it to life. It’s a fun, helpful way to dream big and help create a space perfectly tailored to your lifestyle and taste.
There are a few ways to go about creating a design mood board, so let’s get started.
Step 1: Choosing Your Medium
Gathering images and inspiration for your interior design mood board can be done by gathering images online, or through physical objects, but how you display them is up to you. Choose between a physical design mood board or an online one before you start looking for inspiration. Here’s a quick breakdown on each option:
Physical
Creating a physical interior design mood board by using a corkboard, poster board or any flat surface like an empty wall or spare table is a great option if you prefer physical photos and want tactile pieces in your design mood board.
Online
If you’d rather curate your board on the go, try using an online platform. Websites and apps like Pinterest and Canva are valuable sources of inspiration from around the internet. Both are free and easy to use, and come with tons of access to photos, motifs and beautiful images you can draw your own ideas from.
Pinterest allows you to pin images from all over the internet to different boards so you can customize your inspiration by room, colour, style and more. The versatility of this option makes it the easiest way to cultivate an online interior design mood board. If you’re new to Pinterest, The Brick’s Pinterest page can help you get started.
If you’re into a more streamlined design mood board, Canva is an online, user-friendly graphic design tool that lets you see your inspired images on one page. It can be an excellent way to visualize how the pieces you’ve curated go together.
You can also use tools such as Photoshop or any number of mobile interior design mood board apps as they work in similar ways. Or, keep it simple by gathering images and saving them in a photo folder on your phone or computer for easy access when you can't be on the internet.
Whichever medium you choose is a matter of preference and how you want to go about gathering inspiration. An interior design mood board doesn’t have to be fancy or high-tech, it just has to work for you.

Step 2: Looking for Inspiration
Once you have decided where and how you’re going to display your design mood board, it’s time to start finding inspiration.
Fun Tip: Consider the look, aesthetic, and overall vibe you want for your space and look for those terms when searching. Descriptive style words like glam, cozy, rustic or country can help inspire and refine your search.
Where to Look
If you aren’t sure where to look when building your interior design mood board, we recommend checking out some of our blogs about interior design such as country style, what to do with an unused dining room, or even furniture trends for 2023. We also have My Brick Home, where we share inspiration throughout the seasons, already organized by room for your convenience.
Plus, you can search our website for descriptive words like retro, cozy, glam, country, industrial and more to find furniture inspiration for your design mood board. We’re also on Instagram where you can find fun ideas and photos to draw inspiration from.
Don’t forget to search magazines, books, print outs and other physical media sources. And remember to look for inspiration outside of the box: fabric samples, paint swatches, art, or even items straight from nature like flowers, shells, and wood can be wonderful additions to your interior design mood board. Drawing ideas from your surroundings is a creative experience, so anything goes. If it inspires you, put it on the board!
If you know what kind of colour palette you’re looking for, half of the battle is already done! Narrow down your search to include these colours and you’ll be well on your way to creating your design mood board. If you are looking for a general vibe rather than specific colours to start off with, that’s okay too! Head straight into searching for styles over colour.
Step 3: Collecting Inspiration
Start pinning, screenshotting, printing out and collecting whatever inspires you, and add it all to your design mood board. There can be just a few things or lots to look over if needed. The more you search for inspiration and start to collect images that speak to you, the easier it will be to narrow down items for your new space later. It can be overwhelming to start, but take note of everything that catches your eye for now, as this is just the collecting phase.
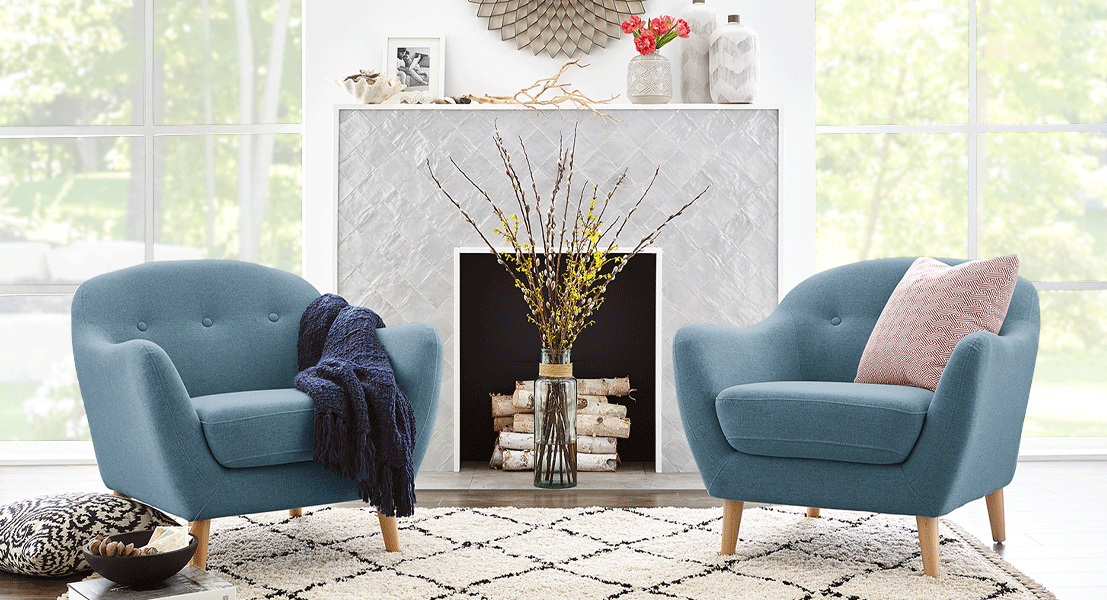
You can put images of anything on your board, but if you come across pieces that you’re looking for, like a bed in a bedroom design mood board or a couch for a living room design mood board, keep it! Even if you wind up not purchasing that exact item, it can help guide your search. Having a focal point to work around can be helpful too - if you already have an item you want to build the room around, start there and work outwards.
Fun Tip: If you find yourself on furniture websites, add items you like to a wish list or favourites page (if available) and make note of it in case you want to purchase them later on.
There is no rush in creating a space you love. When designing using a mood board, you can add everything that inspires you at once and sort through it later or organize it as you go. This part is personal to how you like to organize and visualize ideas.
Step 4: Curating the Inspiration
Once you are done gathering ideas and imagery, it’s time to narrow it down. This is an important step in bringing your interior design mood board to life, so take some time to go over it. See if you have the same colours throughout or the same styles, and don’t forget to look for themes, colour palettes and aesthetics that truly showcase how you want your space to be. Remove anything from your interior design mood board that no longer inspires you or won’t work for your room and focus in on what will help create your vision. This process can take as long or as short a time as needed, just until you are happy with what you have. Remember that your design mood board is meant to guide you in your shopping journey and be a reference point, so make sure it only showcases what you really want your room to evoke.
Once you have narrowed down your board to what truly inspires you, voila! You’ll have created your very own interior design mood board.


Extra Step: Start Shopping!
Now that you have a clear vision of what you would like your space to look like, you can start shopping. Begin your project by referencing back to any of your favourited items, or search in store and online.
The Brick has something for every room. From bedroom furniture to appliances, electronics, mattresses and even patio pieces, there is something for everyone and every design style. We hope this guide on how to make a mood board has inspired you, and we can’t wait to be a part of bringing your vision from the board to real life! Shop at thebrick.com to get started on your redecorating journey.
- Kailey Friedrich

Finding the Right TV Placement in Your Home
Whether you’re buying a new TV or re-housing an existing one, it’s time to find the perfect spot for it to go. If purchasing, and you have decided what TV to buy, the next step is to place it. Playing around with placement lets you find the sweet spot of comfortability and quality, with an ideal viewing angle that gives your neck and eyes as little strain as possible. There are just a few things you need to keep in mind when placing your TV, and in the end, you’ll be able to happily enjoy family movie nights in comfort.
First, make sure your television gets placed in a spot with accessible power supply to support the screen and any other electronics you need, such as video game consoles or sound systems. Extension cords might make things easier, but as a permanent fixture they can be annoying and easy to stumble over. Try to place your TV away from high-traffic areas, as accidents can happen, especially if there are pets or children around.
Decide on which wall you want to place your television. Do you want it to be the focal point of the room, or do you have another main attraction you want to show off? Consider placing your screen on the opposite wall from the main focal point for a balanced room. However, remember to look out for how the sun hits the spot you’ve chosen. Sun glare can make even the most expensive screen look washed out and desaturated, so you will want your TV in a darker area to avoid having to close the curtains every time you want to catch a game.

Keep the seating as central to the television as you can. It’s better for the body to face the TV head-on, and this is also how you get the best viewing experience. Depending on personal preference, the ideal screen-to-eyes distance is around 1.6 times the diagonal length of the TV. For example, the ideal distance for a 55” TV is about 7.5 feet. Using this calculation, you get an immersive experience while achieving the highest possible perceived image quality.
Ease neck and eye strain by placing the center of the screen as close as to eye-level as possible. This is generally around 42” from the floor but can vary. To test possible heights, you can place a piece of tape on the wall and try staring at it from your spot on the sofa to see if it would be comfortable for hours on end. A TV that’s too high or too low can sometimes cause physical pain – this is why placing your television on top of a mantlepiece or above a fireplace can be a bad idea. Since the angle of the screen can affect viewing quality, consider investing in a mount that can extend and tilt if you decide to place it higher up. The end goal is for you to look at the TV straight on, so you can stay comfortable while binge-watching your favourite shows.

Once you know where to place your TV in your room, the next step is to consider how. Decide if you are looking to mount it on the wall for a sleek and subtle look or place it on a console to add style and substance. You can even wall-mount your screen above a console for a modern appearance that still maintains the practicality of shelving and storage.
If you’re worried about how the final result will look, remember that televisions can be beautiful – some TVs come with thin bezels and the ability to appear like framed artwork on your wall. Samsung’s The Frame collection even has customizable bezels so you can create a stunning living room that suits your personality.
Any TV can look chic with some attention to detail. Surround your screen with artwork or photographs for a gallery-wall look, or integrate it into your decor by adding plants, books and decorative items around it. You can also get an entertainment centre to frame and tone down the presence of your television. Decorating around your TV gives the eye plenty of items to focus on, resulting in the black screen not being too imposing or distracting. This ensures your living room will be a beautiful space, perfect for resting, relaxing and catching up on recent releases.

Placing a TV might seem complicated, with so many facts and numbers involved, but in the end it’s about how it feels to watch the screen from your seat. By testing different placements and learning what you like, you’re bound to find the sweet spot that has all your needs covered. Decor can be moved and added as you figure out what works and doesn’t, so don’t overthink the choices you make. And once you’re comfy and the TV is placed, you can pop the popcorn, invite your friends and enjoy night after night of movie marathons and comfort shows.
- Kailey Friedrich

Decluttering Your Home for Spring
As the sun comes out and ushers in warmer weather, you’re no doubt ready to open the windows and get started on some spring cleaning, but hold that thought. Before the spring cleaning should come an often-overlooked step to refreshing your home – spring decluttering.
Houses tend to get a little cluttered over the winter when we’re spending more time indoors and hanging onto everyday items. However, the less clutter you have filling your home, the easier it is to clean.
Keep reading for some decluttering tips that will help you tackle different rooms in your house to ensure a fresh, clean slate for spring. Plus, check out the Brick’s blog for more of what to include on your spring cleaning checklist.
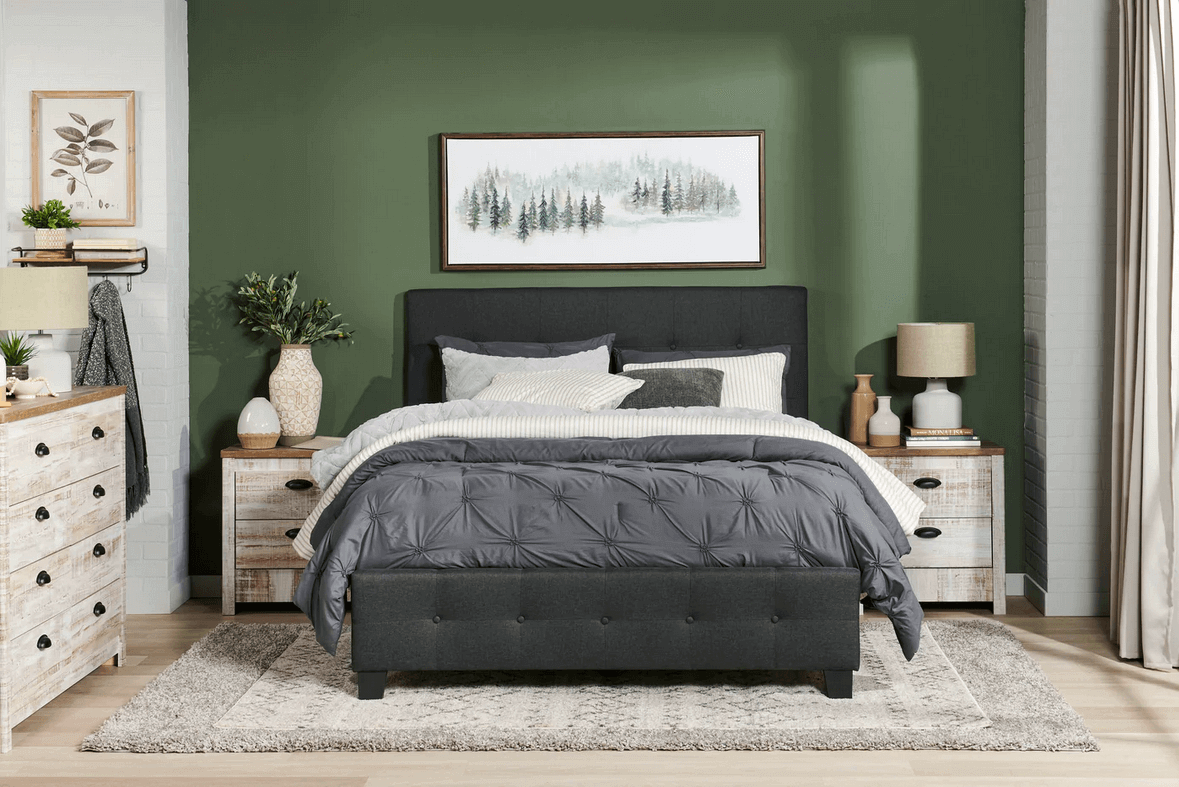
Closet Cleanout

Let’s start in the bedroom – or more specifically, the closet. A decluttered closet is much easier to keep organized, and it helps start your day off on a more positive note when you don’t have to fight through an overfilled rack of clothes.
Consider going through each article of clothing and separating out the ones you haven’t worn in a long time, since there’s a good chance these won’t be missed. In the future, try the hanger tip – place all your hangers backwards, and after you wear and wash something, put it back on a hanger facing the correct way. If there are any hangers still left backwards after six months, then it's time to give those garments a new home.
Decluttering your closet will save you both time and energy in the future. Plus, it will make returning clothes at the end of the day easier, translating to a cleaner bedroom with less garment pileups.
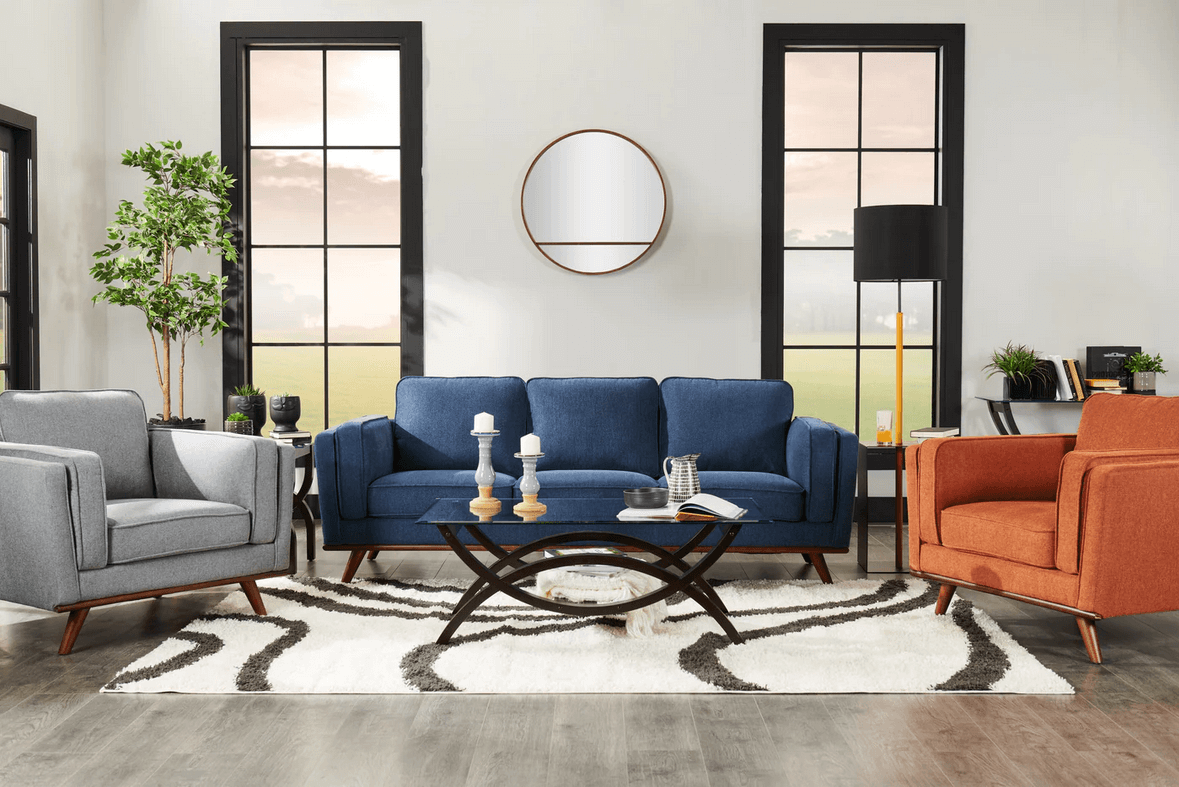
Living Room Revamp

For most people, the living room is considered the hub of the home. For this reason, it’s easy for toys, books, blankets, miscellaneous cords and more to pile up from everyday use. When it comes to decluttering the living room, try to find the most efficient way to keep these items organized yet still within reach.
Consider a stylish accent cabinet or ottoman with a storage compartment that provides somewhere to keep your family’s belongings while also refreshing your space. Another option for decluttering your living space is to add a bookshelf, which can hold more than just the obvious – organize and display knick knacks, magazines, plants and more to add some rustic charm to your living room.
There’s nothing better than relaxing on the couch after a long day, and doing so is much easer in a clean, serene space. Plus, the less there is to dust and vacuum in your living room, the better.
Bathroom Tidy

Bathrooms tend to be both the smallest and messiest rooms in any home. Between soaps, lotions, makeup, medicine and other everyday toiletries, it doesn’t take long for your bathroom cabinets to start bursting at the seams with products. It doesn’t have to be that way, though – read on for some helpful bathroom decluttering tips to keep this well-used space organized.
An easy way to start decluttering is to go through the bathroom and throw away any expired products. Remove expired medication from the medicine cabinet, check expiry dates on your makeup and creams and give them all a toss if they’re well past their prime.
Then, focus on only keeping products you use regularly. Stretched out scrunchies and hair ties, old loofahs and hair tools that haven’t been touched in months don’t need to be taking up space. For clean items in good condition, consider donating. Otherwise, to the bin they go!
Cleaning the bathroom becomes much easier after a good decluttering, since there’s less to navigate around with your duster or sponge. Plus, less clutter means more room to add organizational tools such as shelves, racks and containers to ensure everything is easy to find when you need it.
A good decluttering cuts down on the number of items you have to find spots for, frees up new space for more important items and leaves room to breathe. At The Brick, we have the inspiration you need to declutter your home just in time for spring.
- Kailey Friedrich

